Django React Boilerplate - With Free Samples
Learn how to bundle Django and React and code a full-stack boilerplate using this modern stack - with free samples.


This article explains how to bundle together Django and React and code a full-stack boilerplate that can be reused over multiple projects. For newcomers, Django is a leading Python Framework used for backend development, and React is the most popular JS library used to code user interfaces backed by Facebook. To make this article more useful, a shortlist with open-source full-stack starters is provided. Thanks for reading! - topics covered:
- Section #1: The general view of the project
- Section #2: Django - Short presentation
- Section #3: What is React
- Section #4: Set up Django API Backend
- Section #5: Test the Django API using POSTMAN
- Section #6: Code React UI to communicate with Django
- Section #7: Compile the samples (backend and frontend)
Note: All article resources are available for download from Github. The React dashboards are configured to work with a simple Django API Server. For support feel free to drop any question you might have on Discord.
- Django API Server - open-source project (MIT License)
- React Berry Dashboard - compatible React Dashboard
1# - Project Overview
Web development has evolved with speed in the last few years and now we can code the same features using different combinations and patterns. For instance, if our goal is to build a simple one-page website we can use Wix, Gatsby, Next, Eleventy (11ty), or the old-school Php bundled with jQuery. The possibilities are infinite and the final stack depends on many factors: the technologies we know, project budget, and the will to learn something new. In this article, we will focus on a modern stack that uses Django as the backend technology and a simple UI powered by React.
The product will use a "two-tier" architecture where the React Frontend communicates with the backend via a simple API powered by Django.
How it works
- The Django API exposes a simple authentication interface
- React UI is started and loaded by the browser
- The UI initiate the login at startup and authenticate the user
- The server gets the user credentials and allows the login
- React gets back the server response
- The user can access the private pages of the React UI
The complete this tutorial the workstation must have installed a few tools and libraries used to edit and compile this basic boilerplate. Let's start with the mandatory ones:
- Node JS - used by React UI
- Python v3 - the language used by Django
- GIT - command-line versioning tool
- PIP - the official package manager shipped by Python3
- NPM - a package manager for Javascript
- (optional) Yarn - a faster alternative to NPM
- (optional) VsCode or Atom - modern code editors
The ability to work using the system console might be a plus in this process.
2# - What is Django
Django is a modern web framework that comes with the "batteries-included" concept which means it provides modules and libraries for many common features required in modern web development:
- Session-based authentication
- Abstract Database access via a powerful ORM
- Built-in security patterns
- Helpers: forms, models, and data validation
Django can be installed in many ways and the most recommended way is to use PIP, the official Python package manager. Here is the complete list with commands:
Step #1 - Create a virtual environment
$ # Create the environment
$ virtualenv env
$
$ # Activate the virtual environment
$ source env/bin/activateStep #2 - Install the latest Django version
$ pip install DjangoStep #3 - Build a basic Django project
$ mkdir hellodjango
$ cd hellodjango
$
$ django-admin startproject config .Step #4 - Start the project
$ python manage.py runserver If all goes well, we should see the default Django splash screen when accessing http://localhost:8000 .
3# - What is React
React is an open-source front-end JavaScript library for building user interfaces or UI components. It is maintained by Facebook and a community of individual developers and companies. React can be used as a base in the development of single-page or mobile applications.
Another important fact is the proven popularity: in 2021 the stats shows that React is used as the primary technology in frontend development superseding other frameworks like Vue, Angular or Svelte. For more information about this amazing library feel free to access:
By following the official React tutorial, we can scaffold a project skeleton with just a few commands typed in the terminal.
Step #1 - Install create-react-app (CRA) tool
$ npm install -g create-react-appStep #2 - Create the React app skeleton
$ npx create-react-app reactappStep #3 - Install dependencies
$ cd reactapp
$ npm i
// OR
$ yarnStep #4 - Start the project (development mode)
$ npm run start
// OR
$ yarn start The above command should open automatically the browser window with the React default page.
4# - Code the Django API backend
Being such a mature framework with its first release in 2003, Django is known as a complete, batteries-included library. To serve successfully the React interface, our simple Django server will implement a simple authentication service using JWT web tokens that exposes a few basic methods:
-
/api/users/register: create a new user /api/users/login: authenticate an existing user/api/users/logout: delete the associated JWT token/api/users/edit- edit the information associated with a registered user
To keep things simple as possible, the backend server will use the default SQLite persistence and Django REST Framework (DRF) for the API nodes.
Inside the previously created project, let's create a new Django application called "API":
$ cd hellodjango
$ python manage.py startapp appThe startapp command should create a new directory api with this structure:
api/
    __init__.py
    admin.py
    apps.py
    migrations/
        __init__.py
    models.py
    tests.py
views.pyCreating an API interface to manage transactions usually go this way :
- Creating the model
- Creating the serializer
- Write the views or the
viewsets - Register the
viewsetsby creating routes
Here is a simple User Model:
class User(AbstractBaseUser, PermissionsMixin):
    username = models.CharField(db_index=True, max_length=255)
    email = models.EmailField(db_index=True, unique=True)
    is_active = models.BooleanField(default=True)
date = models.DateTimeField(auto_now_add=True)Create the serializer for the User model
A serializer allows us to convert complex Django complex data structures such as querysets or model instances in Python native objects that can be easily converted JSON/XML format, but a serializer also serializes JSON/XML to native Python.
class UserSerializer(serializers.ModelSerializer):
    date = serializers.DateTimeField(read_only=True)

    class Meta:
        model = User
        fields = ["id", "username", "email", "date"]
        read_only_field = ["id"]
Code the viewsets - The code will provided only for Login method (the full code is available at the end of the article)
The routes for the API interface should look like this:
-
/api/users/register: create a new user /api/users/login: authenticate an existing user/api/users/logout: delete the associated JWT token/api/users/edit- edit the information of a registered user
The ViewSet class comes with built-in actions like list, retrieve, create, update, destroy.
from api.authentication.serializers import LoginSerializer

class LoginViewSet(viewsets.GenericViewSet, mixins.CreateModelMixin):
    permission_classes = (AllowAny,)
    serializer_class = LoginSerializer

    def create(self, request, *args, **kwargs):
        serializer = self.get_serializer(data=request.data)

        serializer.is_valid(raise_exception=True)

return Response(serializer.validated_data, status=status.HTTP_200_OK)Register the viewsets
from rest_framework import routers
from api.user.viewsets import UserViewSet

router = routers.SimpleRouter(trailing_slash=False)
router.register(r"edit", UserViewSet, basename="user-edit")
router.register(r"register", RegisterViewSet, basename="register")
router.register(r"login", LoginViewSet, basename="login")
router.register(r"checkSession", ActiveSessionViewSet, basename="check-session")
router.register(r"logout", LogoutViewSet, basename="logout")

urlpatterns = [
    *router.urls,
]Note for Beginners
The above section aims to suggest the concept without providing the full implementation. Curious minds can analyze the whole project, published on Github. For questions, feel free to ask for support in Discord.
- Django REST API - source code published on Github

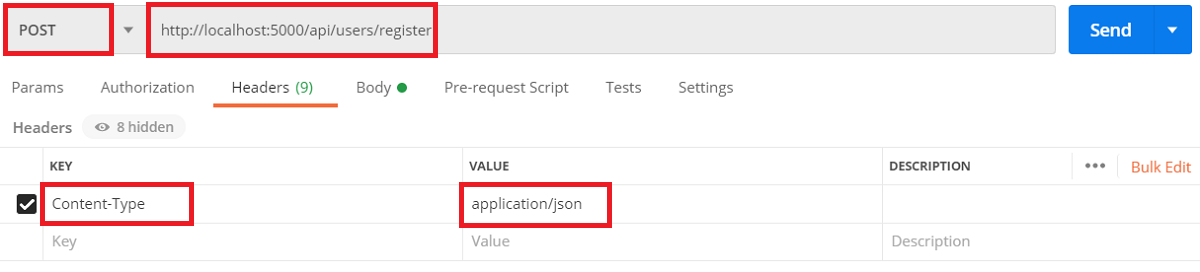
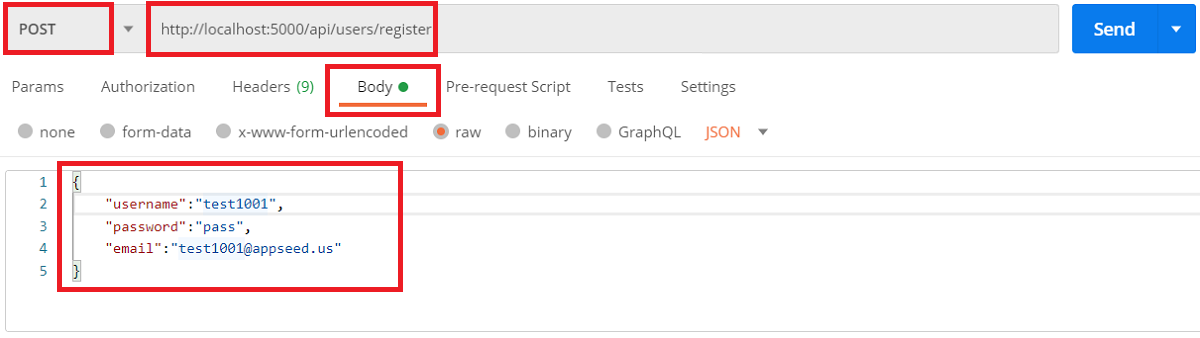
5# - Test Django API using POSTMAN
Once our API is up and running we can use POSTMAN, a popular free tool to test the backend code. We assume the Django API server is started on port 5000 and the registration method is fully coded and functional.
Postman - Create a new collection and request with properties
- Request: POST over "http://localhost:5000/api/users/register"
- Header Content-type: "application-json"
- Body data: user/password and email
The Body Content specifies the credentials for the new user.
The Registration API Response

At this point, the user is created in the database and we can authenticate and move on with our full-stack project.
6# - Code React UI
The React part of this tutorial is coded on top of an open-source project cloned from Github, React Berry Dashboard, a Material-UI template provided by CodedThemes.
The initial project, basically a lifeless React template, will be improved with a few simple features:
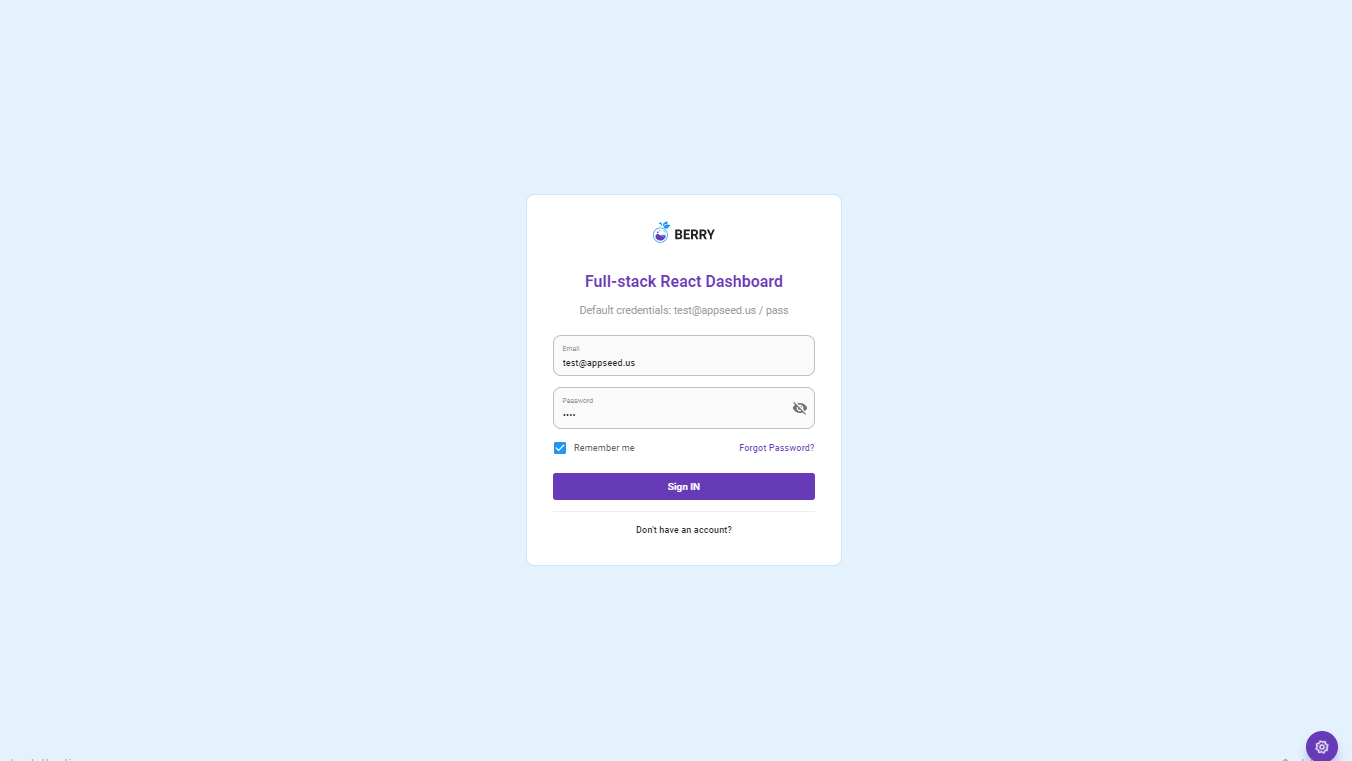
- Usable authentication flow compatible with the Django API
- Actions: Login, Logout, and Register
- Guest users are redirected to the login page
- Private pages are visible only to the authenticated users.
React Berry - Clone the template sources from the public repository
$ git clone https://github.com/codedthemes/berry-free-react-admin-template.git
$ cd berry-free-react-admin-templateInstall Dependencies - via NPM or Yarn
$ npm i
// OR
$ yarn
React Datta Able - Start project in development mode
$ npm run start
// OR
$ npm start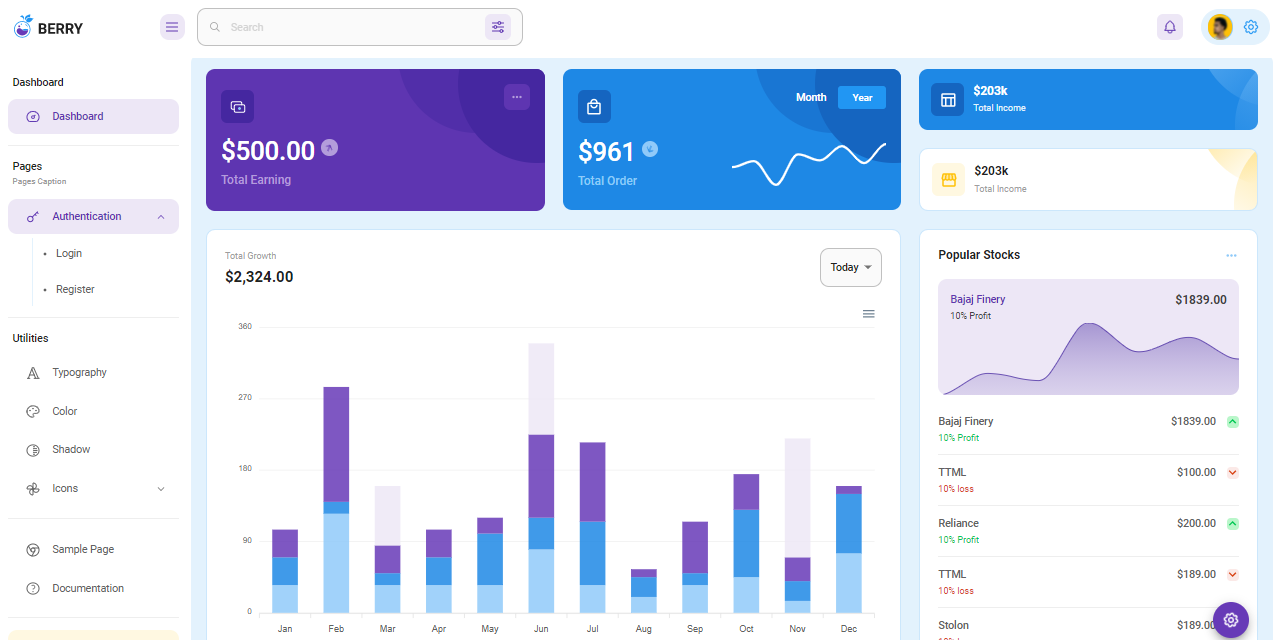
To code the new features the project dependencies should be updated with a few useful libraries:
- Formik - used to enhance and manage the registration forms
- Axios - used to manage the communication with Django API
Once the new dependencies are properly installed, we can proceed further with the code.
Project configuration - URL of the backend API
The application will use a common set of variables imported in different places like login, logout, etc. To make our life easier, it might be a good idea to define all variables in a single file: src/config.js
const config = {
    basename: '',
    defaultPath: '/dashboard/default',
    ...
    API_SERVER: 'http://localhost:5000/api/' <-- The magic line
};

export default config;The most important value is saved by the API_SERVER variable, basically the address of our Django API. When the project goes into production, this address should be updated accordingly with the address of the public API.
Because we want to redirect the guest users to authenticate a Guard Component is provided to check the authentication context for each client request.
import React from 'react';
import { Redirect } from 'react-router-dom';
import { useSelector } from 'react-redux';
import { BASE_URL } from '../../config/constant';

const GuestGuard = ({ children }) => {
    const account = useSelector((state) => state.account);
    const { isLoggedIn } = account;

    if (isLoggedIn) {
        return <Redirect to={BASE_URL} />;
    }

    return <React.Fragment>{children}</React.Fragment>;
};

export default GuestGuard;The next step is to declare a global store where the user's state is saved. The redux-store provides this information in a simple way using a few variables and objects:
export const initialState = {
    token: '',
    isLoggedIn: false,
    isInitialized: false,
    user: null
};

const accountReducer = (state = initialState, action) => {
    switch (action.type) {
        case ACCOUNT_INITIALIZE: {
            const { isLoggedIn, user, token } = action.payload;
            return {
                ...state,
                isLoggedIn,
                isInitialized: true,
                token,
                user
            };
        }
        case LOGIN: {
            const { user } = action.payload;
            return {
                ...state,
                isLoggedIn: true,
                user
            };
        }
        case LOGOUT: {
            return {
                ...state,
                isLoggedIn: false,
                token: '',
                user: null
            };
        }
        default: {
            return { ...state };
        }
    }
};The variables associated with the current user should be updated based on the actions performed in the session:
- Guest access: the session user is Null and
isLoggedInstate is false - Login: the user is successfully authenticated by the backend and. Of course,
isLoggedInstate becomes true - Logout: all session data is deleted and
isLoggedInbecomes false again
At this point, the React UI can be used to register and authenticate users.
7# - Compile the Free Samples
All the above code is already provided on Github in two separate projects:
- Django API Server - open-source project (MIT License)
- React Berry Dashboard - compatible React Dashboard
Step #1 - Compile the Django API Server
$ git clone https://github.com/app-generator/api-server-django.git
$ cd api-server-django
$
$ virtualenv -p python3 venv
$ source venv/bin/activate
$
$ pip install -r requirements.txt
$
$ python manage.py migrate
$ python manage.py runserver 5000At this point, we can use POSTMAN to test the authentication interface as described in the product documentation: Unified API Interface
Step #2 - Compile the React template
$ git clone https://github.com/app-generator/react-berry-dashboard.git
$ cd react-berry-dashboard
$
$ npm i
$
$ npm run start At this point, with the front end and backend up & running we can start using this open-source React UI powered by a simple Django API.
Thanks for reading! During this long post we've tried to cover the basic concepts of a full-stack boilerplate built with React and Django. For more resources, please access:
- More React Apps - index provided by AppSeed App Generator
- Open-source dashboards - crafted in Flask and Django
- Free React Dashboards - a curated list published on Dev.to